Since the beginning of the PhD, I knew I needed a better way to handle a library than collecting a huge file with BibTeX entries. However, I was not happy with most reference management software. Mostly because rather sooner than later it felt like I could not really have the control I wanted. Unless (of course) I started paying them for features such as storing my files in the cloud, or syncing the entries across multiple computers.
As usual, I went with the not-so-fully-featured-but-free option: Zotero, and never looked back. Configuring it for my use case, however, was not an easy task. I needed:
- A library that I can access from my laptop (a Mac), my lab workstation (dual boot Windows and Ubuntu), and the iPad.
- My annotations to be synced across all of these platforms (so, all of them should be pointing to the same version of the file)
- A solution compatible with Google Drive.
- I wanted to keep the file structure I was manually handling to be maintained. Because then (and at the time of writing) Zotero does not have an iOS app.
- A way to avoid manually adding 400+ papers and books to Zotero.
Below is the step-by-step guide on how to achieve all of these without spending a week fiddling with all the plugins and configurations.
1. Install the necessary plugins
You’ll need two plugins:
- ZotFile: This plugin will take care of renaming the PDFs based on fields of the paper, as well as keeping the folder structure coherent with Zotero Collections
- Folder Import: You need this plugin only if you want to avoid importing several papers manually. (You will need to install this one only on the computer where you want to build the first Zotero Library, in all other computers you will get all the items synced automatically).
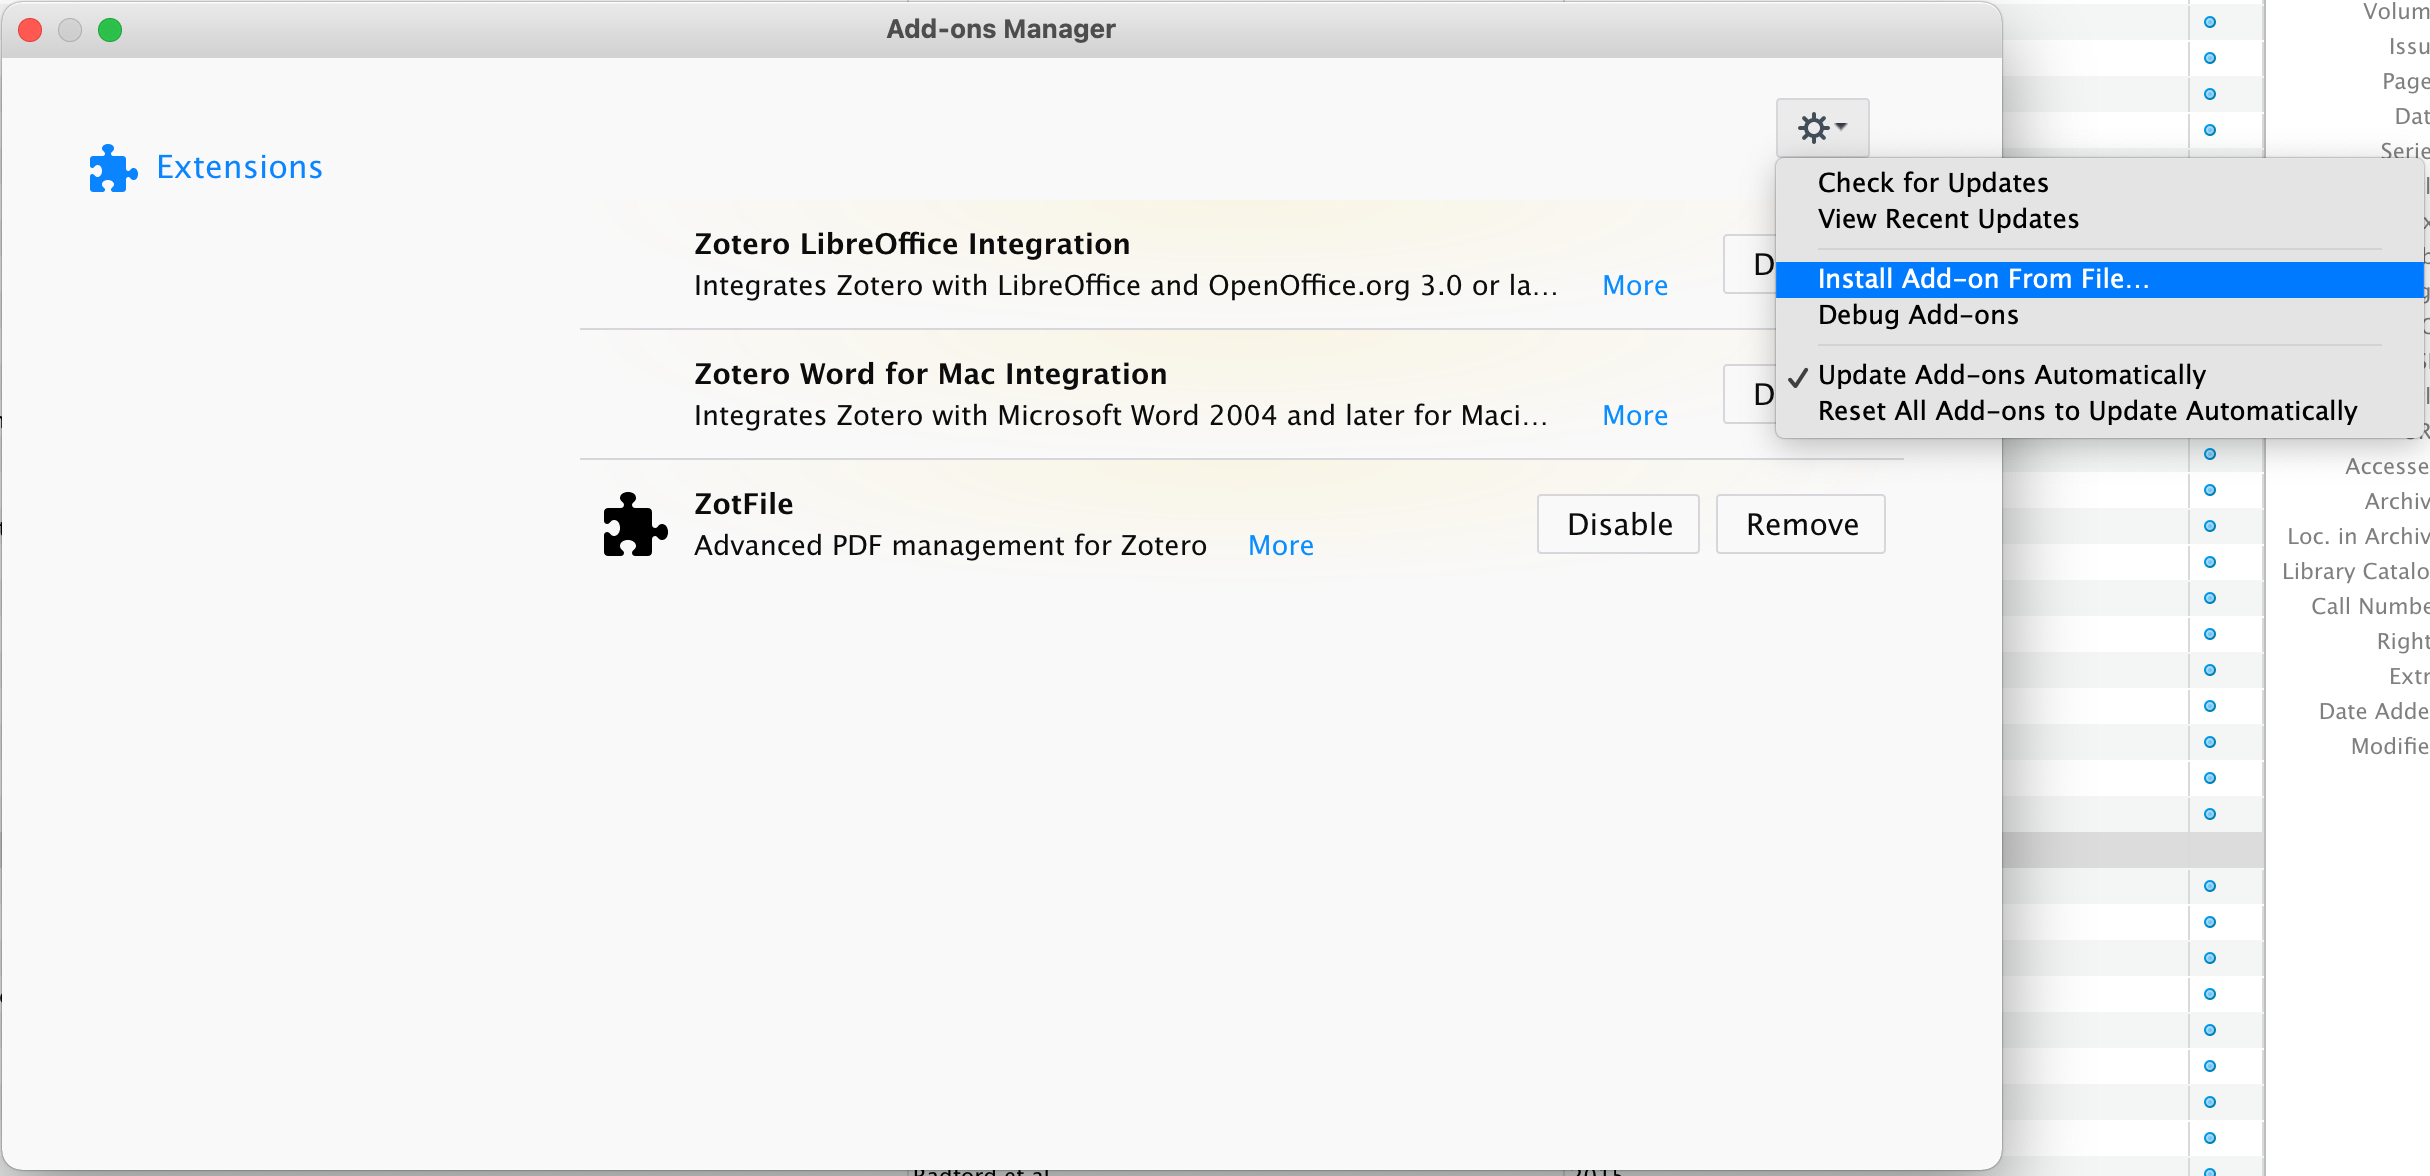
To install a plugin, simply download the latest version of each (these are files with xpi extension), open Zotero and go to Tools >> Add-ons:
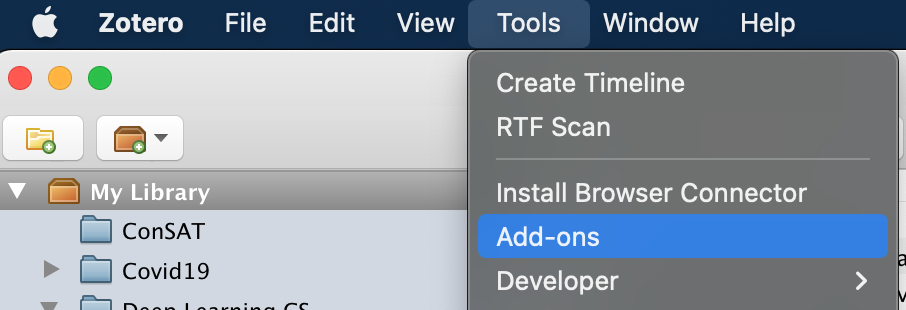
This will open the Add-ons Manager dialogue. Go ahead and select "Install Add-on From File...", navigate to the directory where the plugins were downloaded, and restart Zotero.
2. Set the Base Directory
This is a critical part of the setup, as it’s the one setting that will allow your library to be correctly linked across operating systems.
By default, Zotero points to files using absolute paths. If this is the case, you will need to ensure that every computer has the exact same path in order for the files to be linked correctly. Luckily, this can be easily overridden by setting the Linked Attachment Base Directory to point somewhere we want. In my case, that’s Google Drive.
To set this up, open the Zotero Preferences, go to the Advanced tab, and then to Files and Folders. Click Choose..., and select a cloud folder that will be synchronized by your cloud provider.
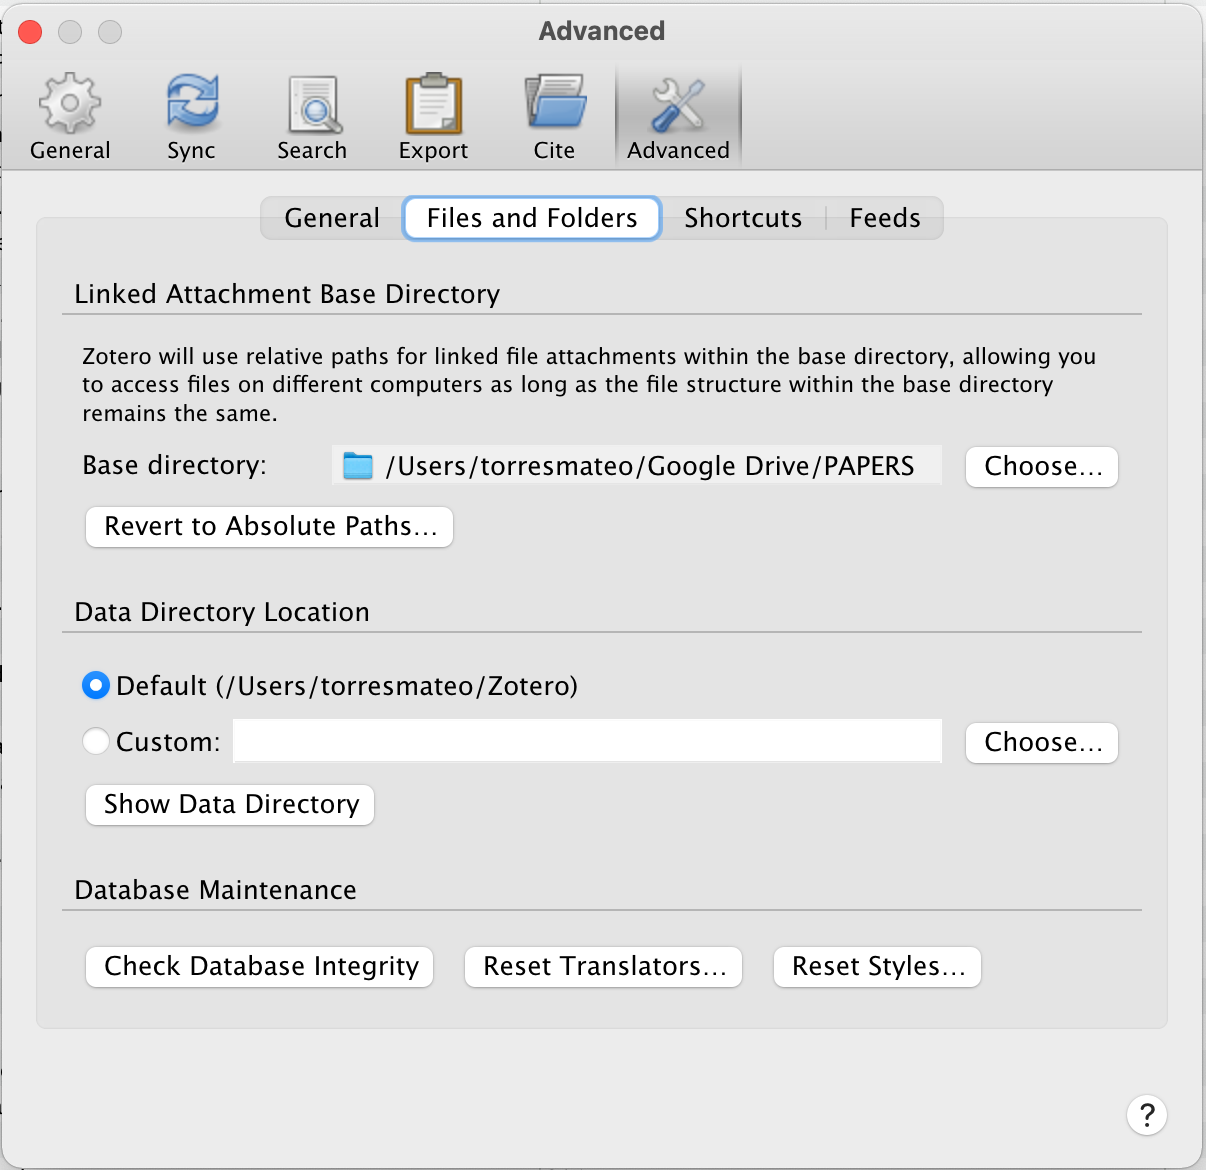
Note: Zotero will still copy files into its default directory, and ZotFile will rename and move that file to the Base Directory, and change the entry in the library. The entry will now point to a Linked File (as opposed to a Stored File).
3. ZotFile configuration
We will be using ZotFile to rename and move all files from the default Zotero directory to the Base Directory, and update the library entry with a link to the moved file. However, ZotFile does not asume that this is the use case we want, and therefore we need to tell it where we want the files to go. For this, we need to set Location of Files to "Custom Location" and choose the same directory we chose as our Base Directory. It is very important that we choose the same folder, or the linked files will not work correctly.
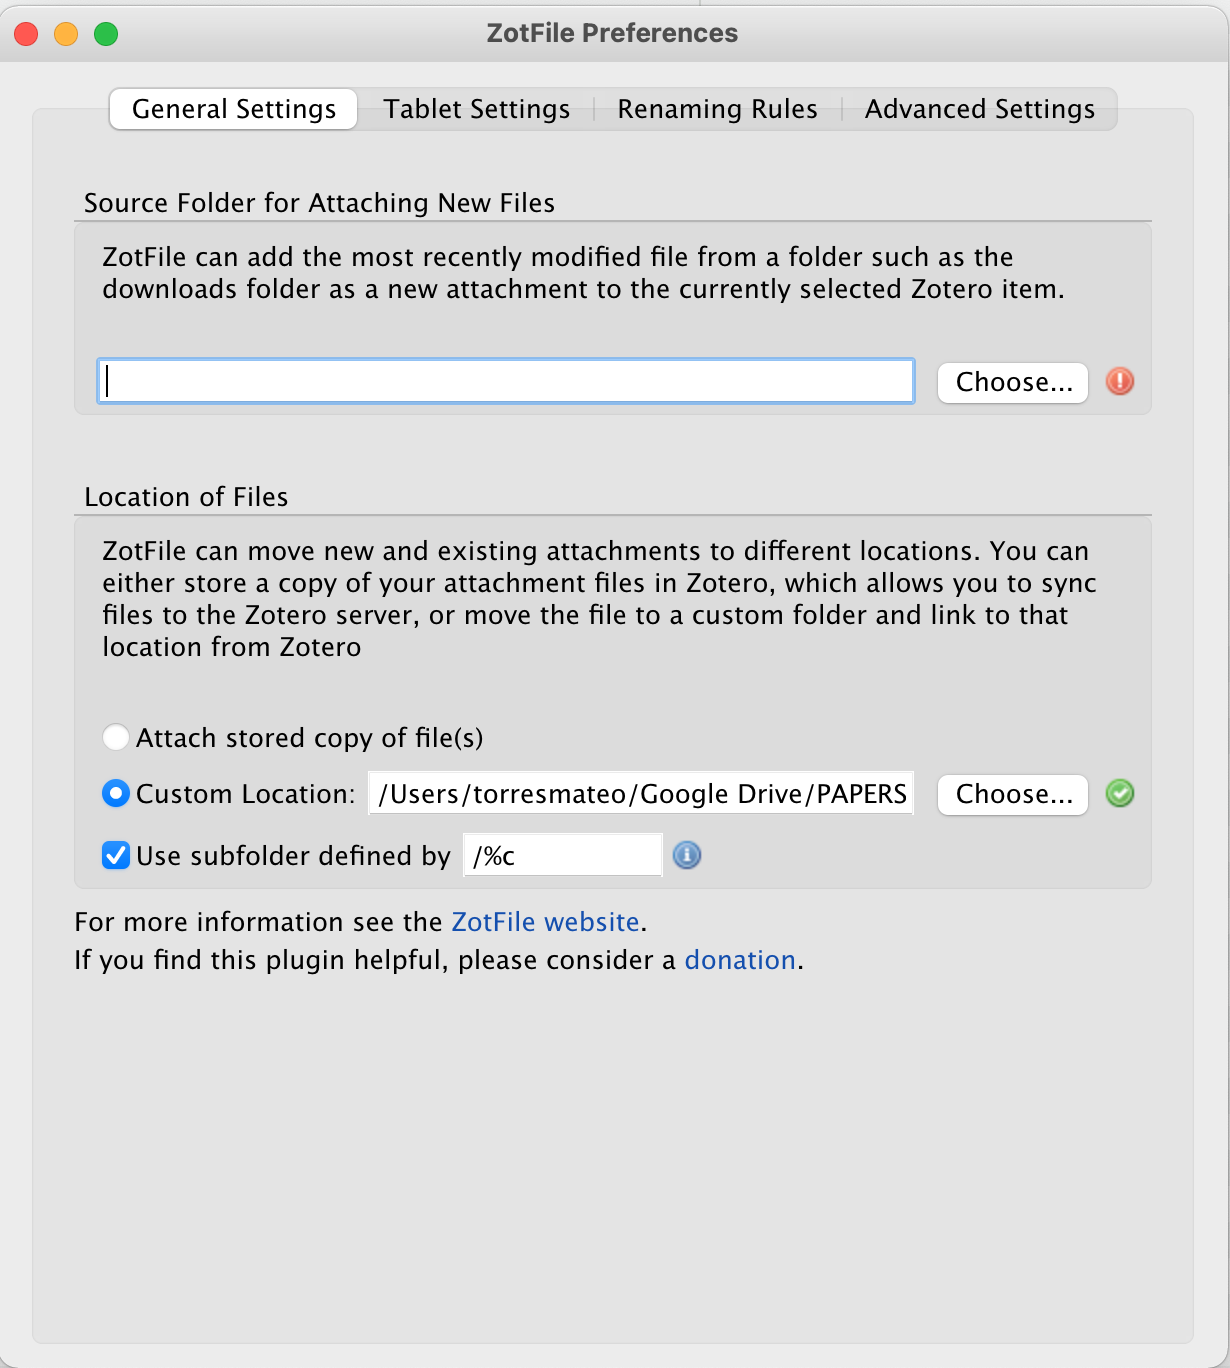
If you want to retain the subfolder structure of the Base Directory the same as the collections in Zotero, you should also set check the Use subfolder defined by option, and set the value to /%c, which is the ZotFile wildcard corresponding to “collection path”.
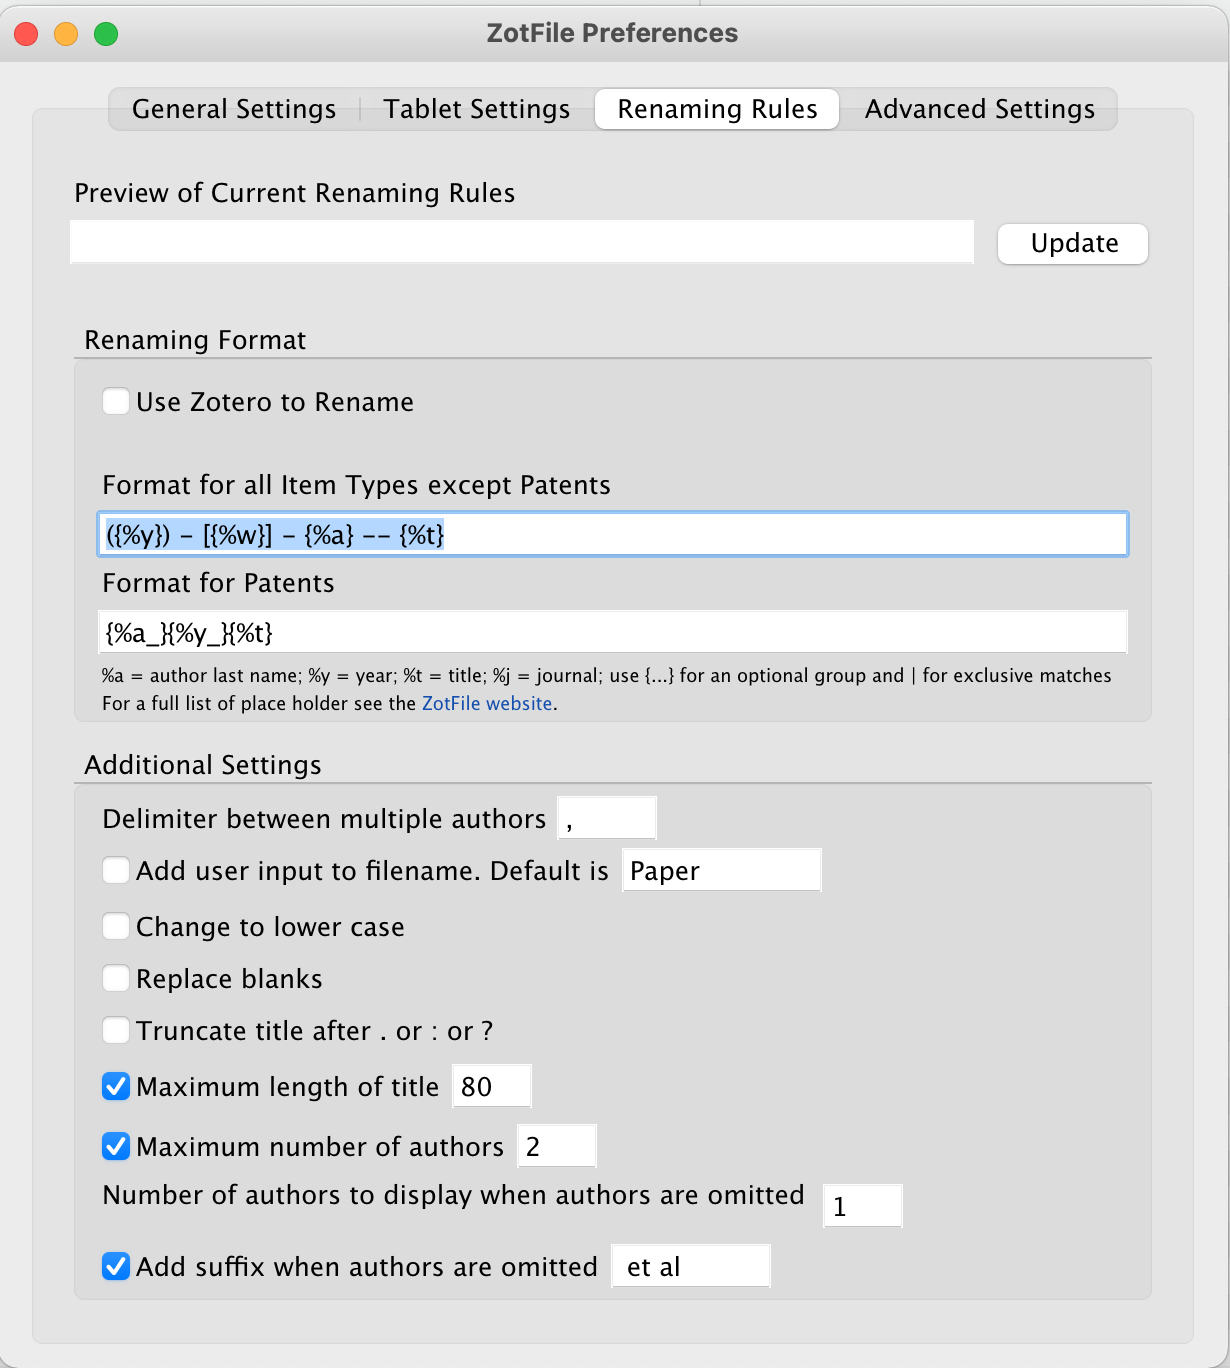
(OPTIONAL) Renaming Rules
For me, a very important part of managing the library is setting names that are easy to navigate. Both Zotero and ZotFile have the ability to rename files based on metadata available for the particular paper. You can use either, but I chose to stick with ZotFile as it’s more versatile.
I recommend you take a couple of minutes and learn the wildcards to build your own. I use the following renaming pattern:
({\%y}) - [{\%w}] - {\%a} -- {\%t}
That is, the year {\%y} in parentheses, the journal {\%w} in square brackets, the authors {\%a}, and finally the title {\%t}, everything separated by one or two hyphens. I like this because it is efective for me to sort papers in chronological order quickly, and it helps me navigate large collections on the iPad. Here’s how the remaining options look for me:
4. Populate the Library
The next step is to “ingest” your existing PDFs into the Library. However, feel free to go to the skip to step 6 if you prefer to start your library from scratch.
Here, we will use the Folder Import plugin, which added the “Add Files from Ffolder” option under the “New Item” menu in Zotero (the green icon on top of the main pane)
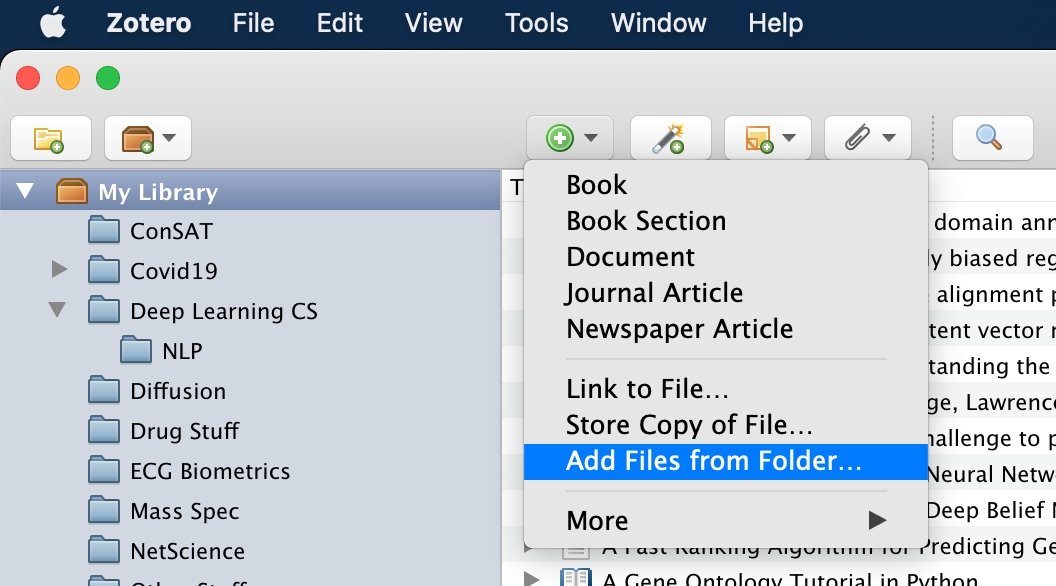
Click that one, and select the folder that contains your existing files. You will be presented with a dialog where you tell the plugin wich formats should be copied:
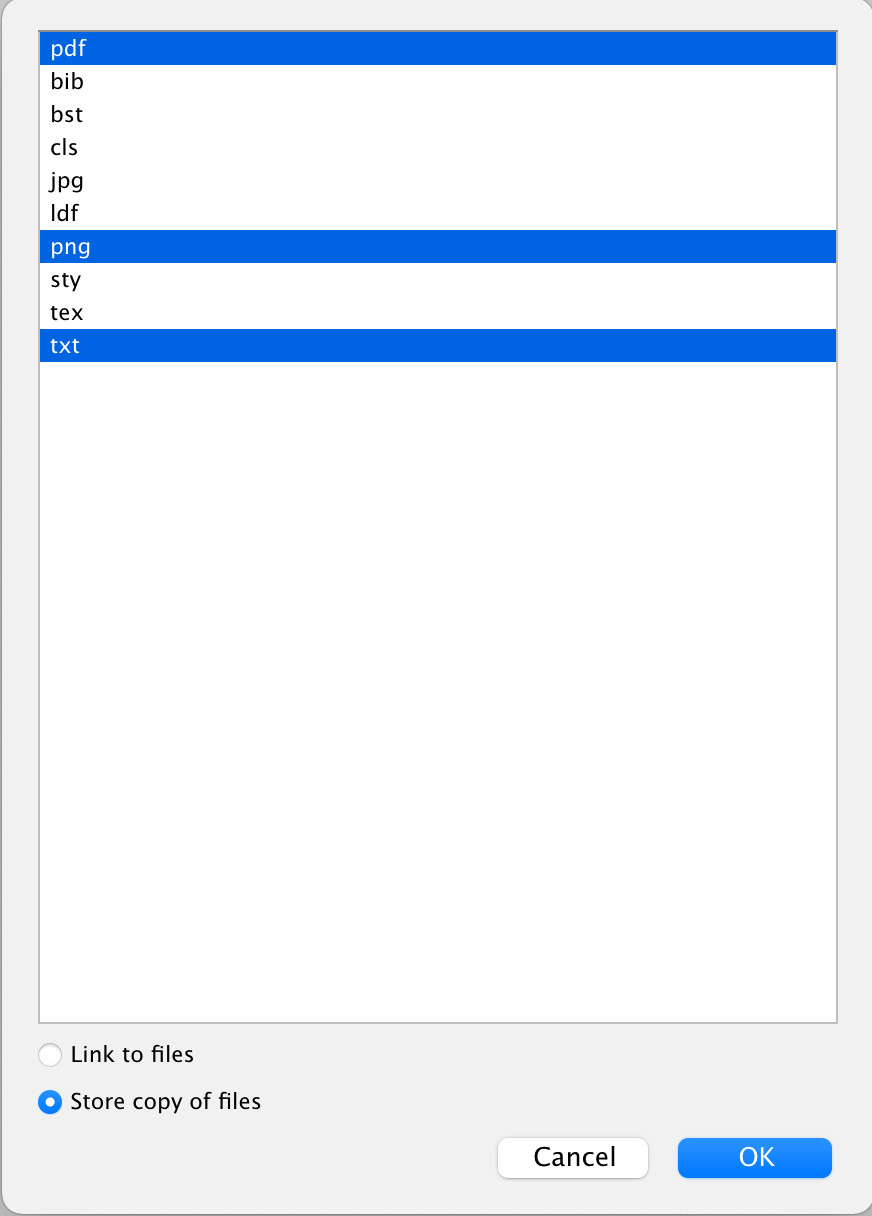
Select all the extensions from the detected ones, and click OK. The copying process should take a couple of minutes.
5. Moving everything to the cloud with ZotFile
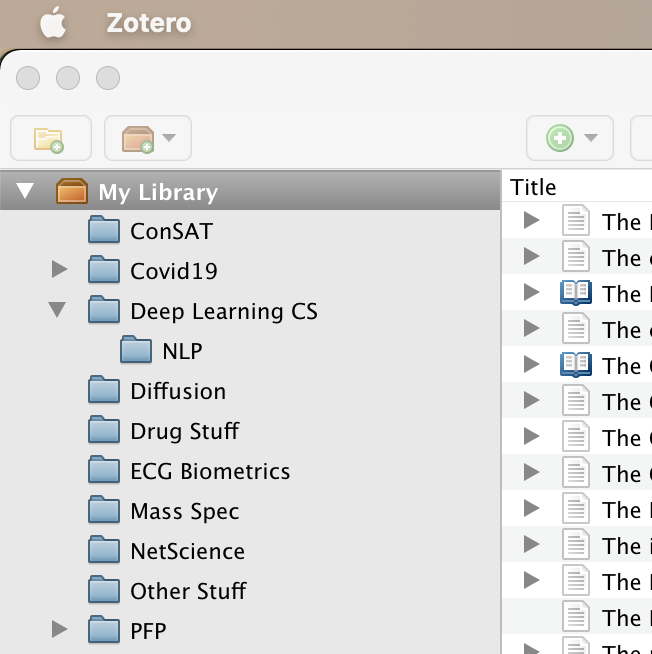
Once every paper is already in Zotero, it’s time to finally move everything to the cloud folder. This should be as painless as selecting “My Library” (the top-level collection):
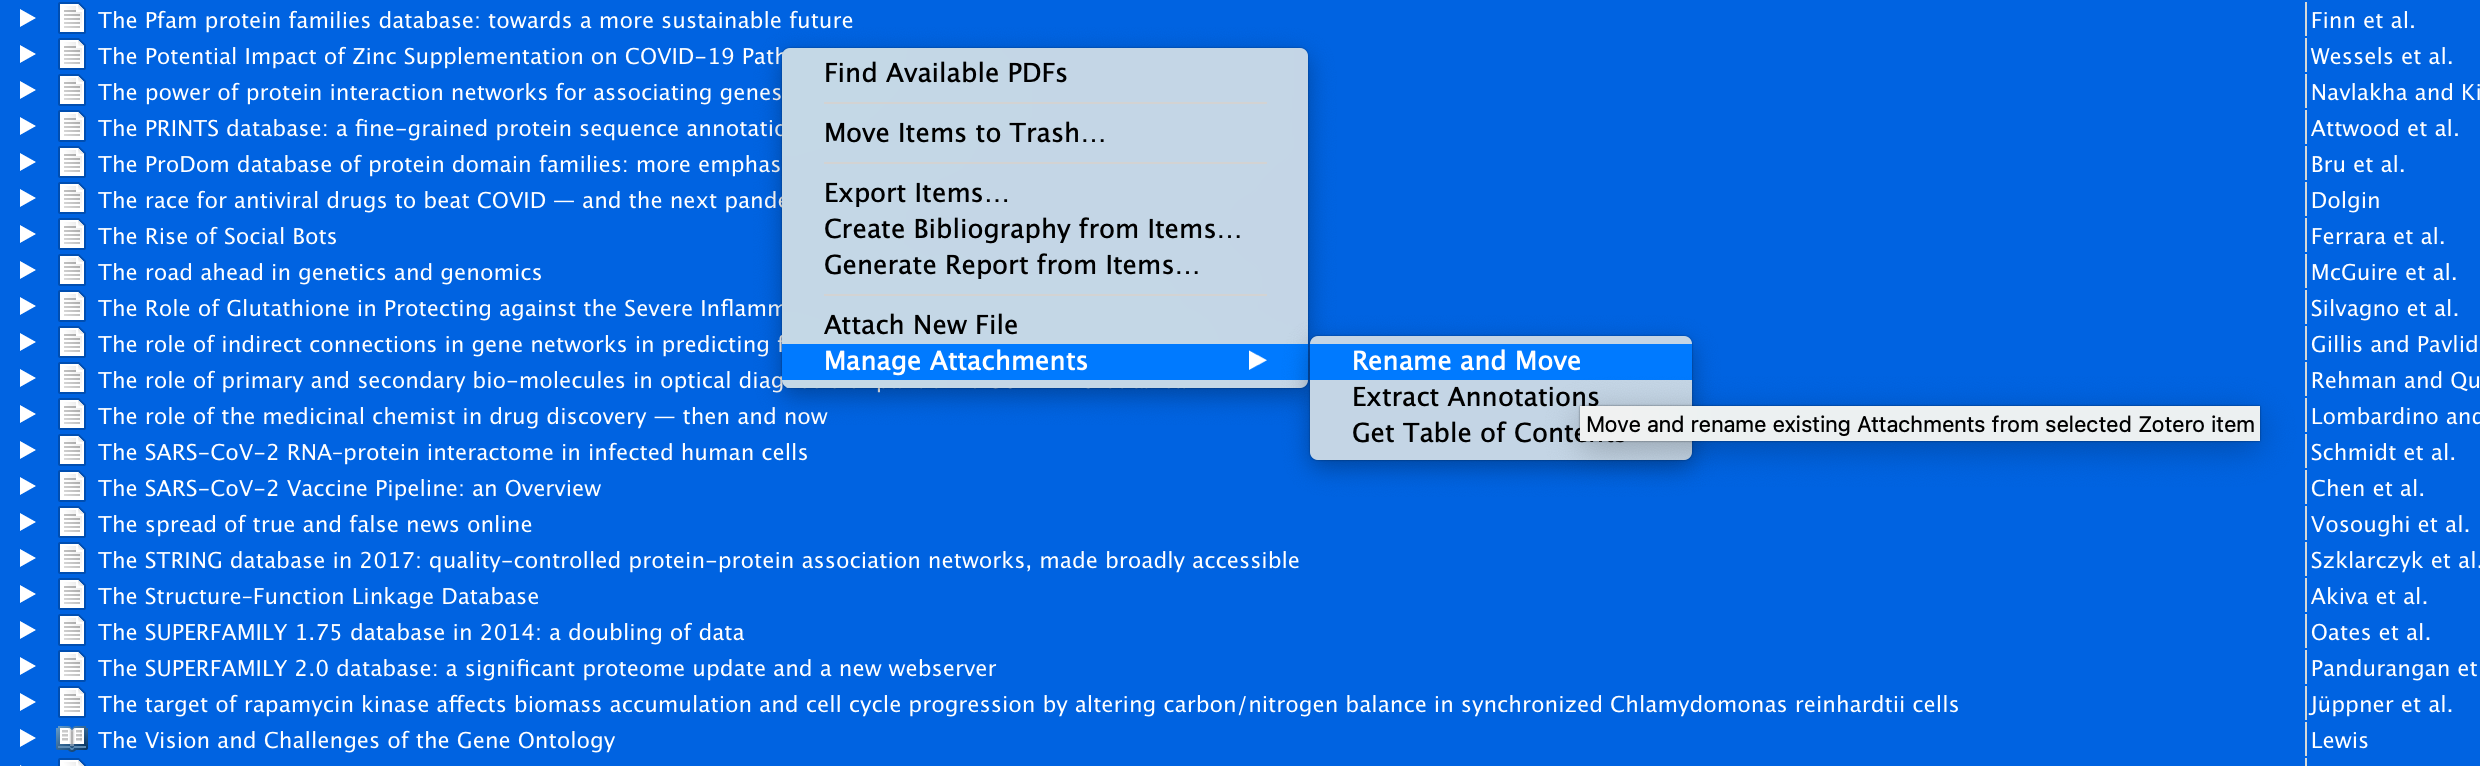
Then, on the main pane, select all items, right-click on the selection, and under “Manage Attachments” click on “Rename and Move”
you’ll be presented with a dialog asking if you’re sure you want to process a big number of papers.
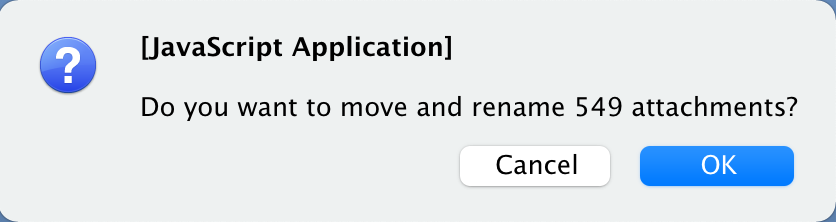
Confirm, and watch your cloud folder be populated with nicely renamed and sorted PDFs.
6. Synchronize the Library across multiple Zotero installatations
Once you’re happy with the initial library, and all files are renamed and organized in a cloud folder, you can safely create a Zotero account, and sync the library across multiple installations. Remember to set the base directory and configure ZotFile on the new installation before logging into your account.
7. Final tips:
- Zotero has excellent extensions for all major browsers which add a very convenient button to download the paper from the web. Once the item is added, ZotFile automatically renames the paper and places the linked file in the right directory.
- You can have multiple files associated with the same item in Zotero. I use this when I need to keep a “clean” version of a book or paper for sharing with colleagues.